
If you’re on this page, it means you want to:
- Turn a Twitch Stream into multiple clips
- Make a couple of clips from streams
I’m going to teach you how to do just that, using free methods!
How to Turn Twitch Streams into Clips
The fastest way to turn a Twitch stream into a Clip is to use Twitch’s internal tool. Alternatively, use SendShort to create + edit clips with AI.
Let’s talk about both ways of doing this.
Method 1: Make a Clip on Twitch
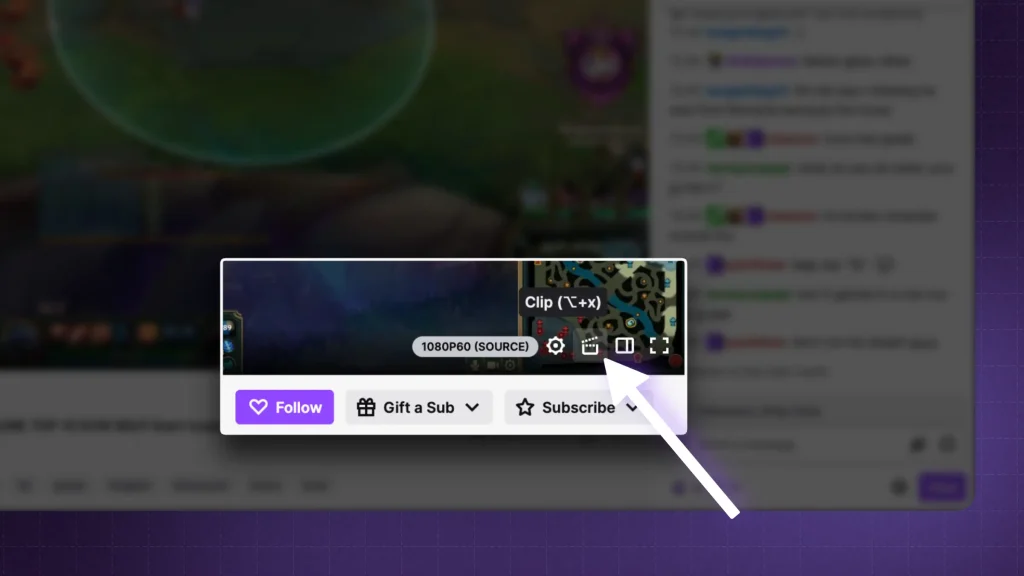
- Open a Twitch stream
- Click the “Clip” icon
- Adjust your new clip: Length, Audio etc
- Publish & Download

Pro Tip: You need to be logged in on Twitch to clip a live stream.
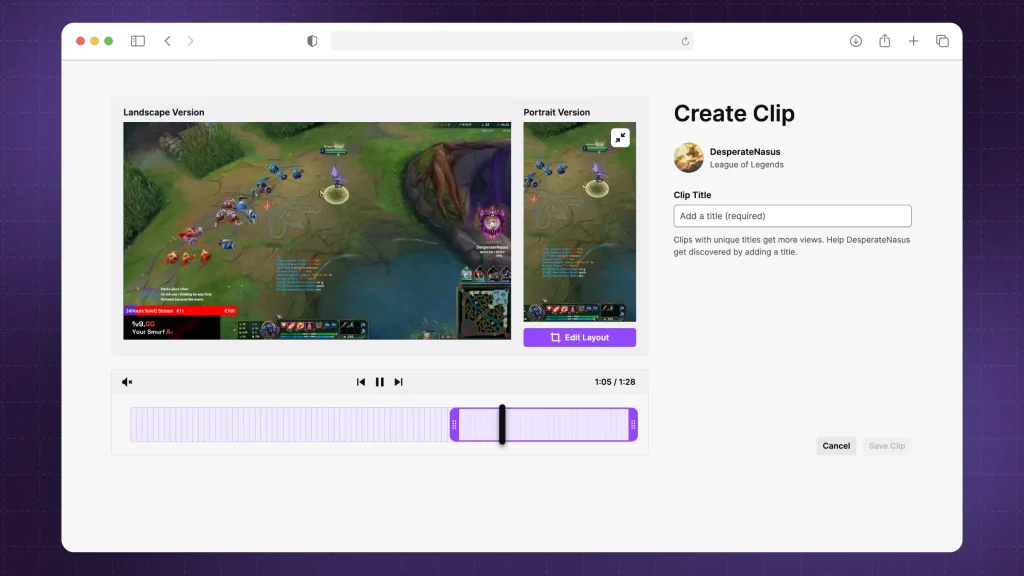
You’ll then get redirected to a page where you can edit the clip:

Over here you can do the following:
- Select the length
- Change from landscape to portrait
- Re-crop the video
- Mute or change the volume of the clip’s audio
- Add a title
When finished, just click “Save Clip” and Twitch will do that for you.
Feel like this didn’t answer properly? Have a look at Twitch’s guide.
Method 2: Use an Online Tool
The most reliable way to create fully-automated Twitch clips is to use SendShort. Add your video, select a clip (or more), and AI edits for you.
- Create a free SendShort.ai account
- Upload your clip
- AI automatically adds captions and effects
- Optionally: Edit the clip further
- Export video

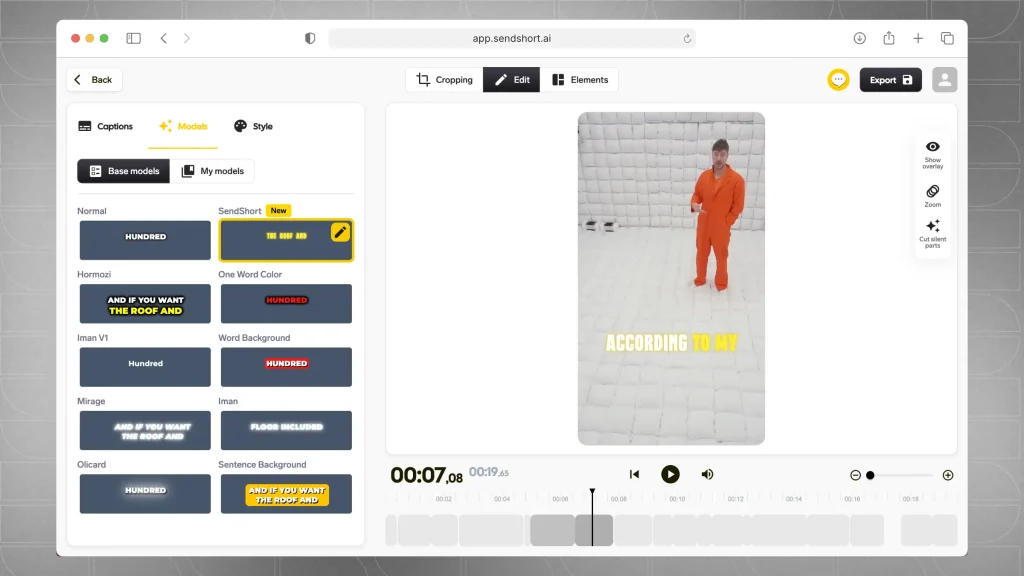
This is how SendShort’s editor looks.
Pro Tip: SendShort can also translate your video in other languages! With it, you can reach larger audiences in the click of just 1 button.
FAQ
1. What happens when you clip a stream?
Clipping a stream involves creating short, shareable segments from a longer live broadcast or recorded video. Here’s what happens when you do this:
- Content Selection: You choose a specific moment or highlight from the stream that you want to clip, often something entertaining, informative, or engaging.
- Duration: Clips are usually brief, often ranging from a few seconds to a couple of minutes, making them easy to consume and share.
- Creation Process: The platform you’re using (like Twitch or YouTube) provides tools to create clips. This typically involves selecting the start and end points of the segment you want to clip.
- Storage and Sharing: Once created, the clip is saved separately from the original stream. It can be shared on social media, embedded in websites, or sent directly to others.
- Engagement: Clips can attract viewers to your content, encouraging them to watch the full stream or follow your channel. They serve as promotional tools and highlight reels.
- Analytics: Many platforms provide analytics for clips, allowing you to see how many views, likes, or shares they receive, helping you gauge audience interest.
Clipping is a great way to repurpose content and engage with your audience, drawing more attention to your original streams.
2. How to make clips on Twitch mobile?
Open the Twitch mobile app, go to a stream and tap the clip icon (scissors) in the video player. Select the desired clip duration, then tap “Clip” to save and share it.
3. Can you make Twitch clips after stream?
Yes, you can make Twitch clips after a stream.
You can access past broadcasts in your channel’s video section and use the clip tool to select and save segments from those recordings.
Thanks a lot for reading this,
David Ch
Head of the Editing Team at SendShort


