YouTube: Edit Closed Captions

In this guide, I’m teaching you how to edit:
- Auto-generated captions (auto captioning)
- Custom subtitles
For any YouTube video, for free. We’ll do this within YouTube Studio, so you don’t have to download any app or waste any time.

How to Edit Captions on YouTube
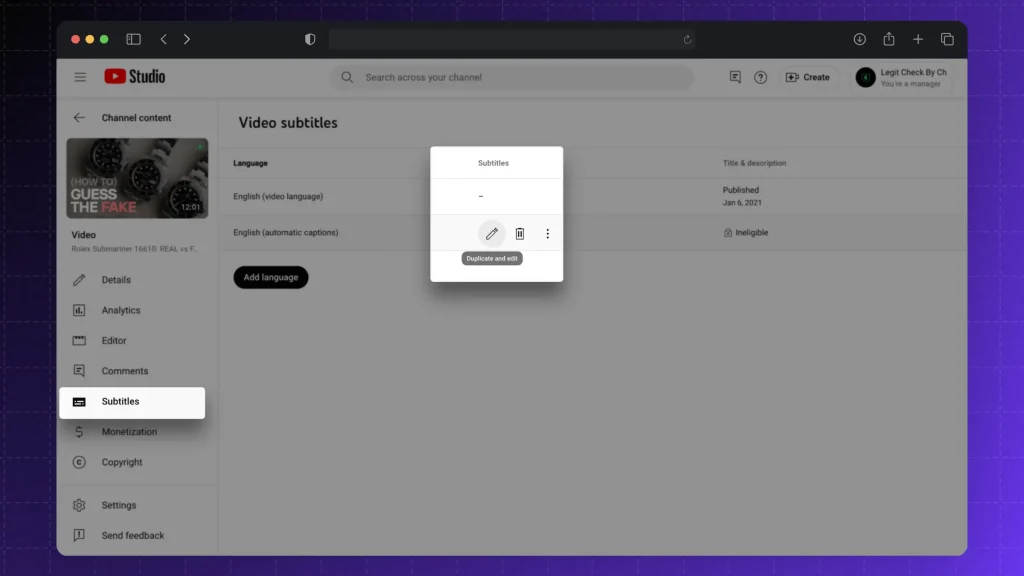
To edit captions on YouTube, open the video in YouTube Studio and go to “Subtitles” on the left. Click a language and hit “Edit” to make changes.
- Go to YouTube Studio
- Select a video
- Go to “Subtitles” on the left
- Hover your cursor above a language
- Click “Edit” or “Duplicate and edit“
- Edit & Save changes

If you’re editing YouTube’ auto-generated captions, then you’ll see the “Duplicate and edit” button, like we did in the image above.
Editing any other subtitles? You’ll see just the “Edit” button.
Pro Tip: Editing subtitles is the same on Mobile.
Edit YouTube CC with SendShort
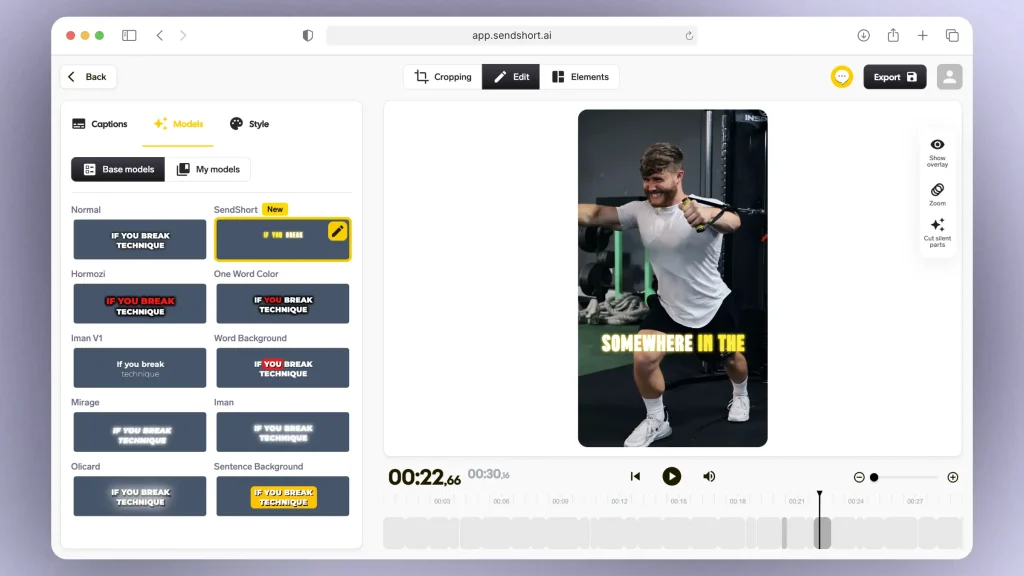
SendShort simplifies the process of adding and editing YouTube captions with its advanced AI tools.
You can auto-generate captions for longer videos and turn them into optimized Shorts in just a few clicks.

- Export Directly: Once captions are finalized, export your video with captions, ready to upload to YouTube.
- Automatic Captions: Upload your video to SendShort, and let the tool automatically generate precise captions based on speech and context.
- Edit Captions Easily: Make real-time edits to the captions, adjusting for timing, accuracy, or style preferences.
Use SendShort’s features to turn your captioned video into engaging YouTube Shorts with the correct text format.
Frequently Asked
1. Can you edit YouTube captions after posting?
Yes, you can edit YouTube captions after posting.
The Process: Simply go to the video in YouTube Studio, click on “Subtitles,” select the language, and edit or replace the captions as needed.
2. How to remove captions on YouTube?
To remove captions on YouTube, go to YouTube Studio, select “Subtitles” in the left menu, choose the video, and click on the three dots next to the captions you want to delete. Select “Delete” to remove the captions permanently.
3. How to remove Subtitles from YouTube Shorts?
To remove subtitles from YouTube Shorts, open YouTube Studio, go to “Content,” and select the Short you want to edit. Click on “Subtitles,” choose the language, then click the three dots next to the subtitle track and select “Delete.”
Thanks a lot for reading this,
David Ch
Head of the Editing Team at SendShort


