
Premiere Pro: Add Subtitles & Captions

You’re most likely in this scenario:
- You’re editing a video in Adobe Premiere Pro
- And you need to add subtitles (or captions)
- But you’re not sure how to do it
This is the only guide you need. I’ll teach you how to do it automatically, manually, and how to import subtitles.
Best Part? It’s 100% free (besides your Adobe subscription).
How to Add Subtitles & Captions in Premiere Pro
Method 1: Automatically
Answer: Open Premiere Pro and go to “Captions” > “Transcribe Sequence”. Then, mark clips as “Dialogue” and click “Transcript” > “Create Captions” to add them to your timeline.
- Open a project in Adobe Premiere Pro.
- Click “Workspace” > “Captions“
- Select “Transcribe Sequence“
- Mark clips as “Dialogue” > Select language.
- Click “Transcript” > “Create Captions“
With this method, you’re basically using Adobe’s captioning feature to automatically transcribe your video’s audio and add the captions.
You just have to select the language spoken in the audio and… Boom, your subtitles have been added to the timeline!
However: If Adobe’s feature isn’t accurate, you can also add the subtitles yourself. Join me, as this section uncovers the step-by-step process.
Method 2: Manually
Answer: To manually add captions in Adobe Premiere Pro, open the “Captions” workspace. Click “Create New Caption Track” > “Subtitle” and click “OK”.
- Open your project in Premiere Pro.
- Go to “Captions” > “Create New Caption Track“
- Select “Subtitle” > “OK” to confirm.
- Open the “Text Panel” and click “+” to add a new caption line.
- Type in your subtitle line.
- Repeat steps 1 → 5 for every line.
With this method, you’re basically assigning each line of subtitles to the same audio sequence (so you’re matching the text with the words spoke in the video).
Method 3: Import File
To import a subtitles file in Adobe Premiere Pro, go to “File” > “Import” > Choose your file > Hit “Open” and add it.
- Open a project in Premiere Pro.
- Go to “File” in the nav bar (at the top).
- Click “Import” and browse local files.
- Select your file > Hit “Open” to add it.
These are the subtitle file formats (or types) you can import in Premiere Pro: SRT, SCC, MCC, and STL.
Related guide: What is an SRT file?
Method 4: Short-From Videos
The easiest way to add subtitles to a short-form video edited in Premiere Pro is to take it through SendShort, where the AI auto-transcribes and adds them.
- Export your Premiere Pro video
- Upload it in SendShort (it’s free)
- AI automatically adds captions for you
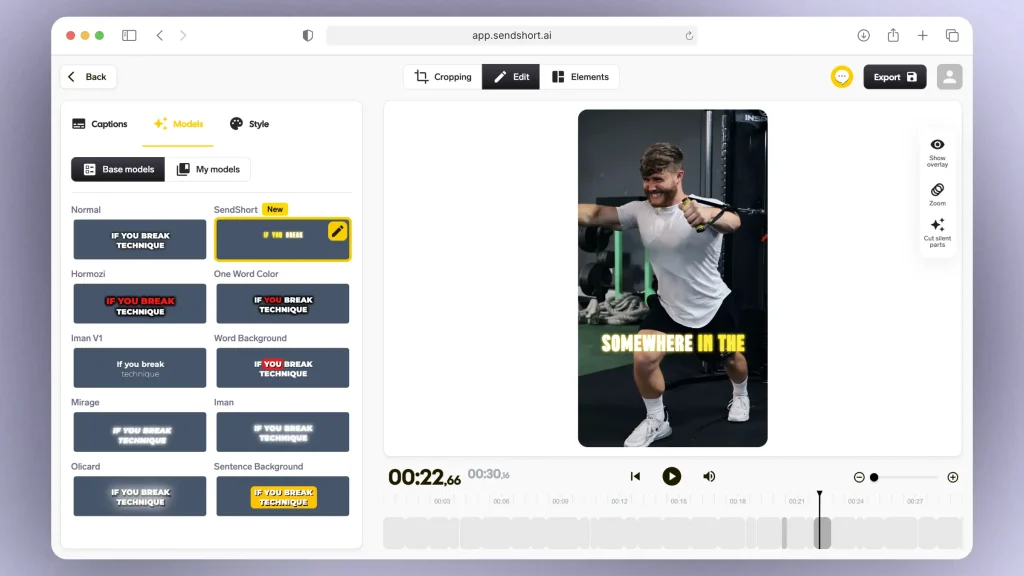
You can also change the style of your captions using the menu on the left. Pick what you think’s going to look best for your video.
Pro Tip: You can also import your own style or create one from scratch. This way, you’ll be able to create the best-looking subtitles for your video initially edited in Adobe Premiere Pro.
Edit your Subtitles & Captions
1. Text and Timing
Text: Double-click the caption clip in your timeline to open the Essential Graphics or Captions panel for text editing.
Timing: Adjust the start and end times by dragging the edges of the caption clip in the timeline.
2. Appearance
Positioning: Use Align and Transform options to reposition captions and adjust background, opacity, and shadow effects as needed.
Fonts: In the Essential Graphics panel, choose a font, adjust the size, color, and spacing.
FAQ
1. Why can’t I add captions in Premiere Pro?
Answer: Because your project settings don’t support captions, or the “Captions” panel isn’t enabled.
Make sure you’re using a compatible version of Premiere Pro and have the correct workspace and caption settings configured.
2. How do you turn on captions in Premiere Pro?
Answer: To turn on captions in Premiere Pro, go to the ‘Window’ menu, select ‘Captions and Graphics,’ and then choose ‘Captions.’ This will open the Captions workspace where you can manage and add captions to your project.
3. Can you edit subtitles in Premiere Pro?
Answer: Yes, you can edit subtitles in Premiere Pro.
Go to the Captions workspace, select the subtitle text you want to edit, and make changes directly in the text field or through the Essential Graphics panel.
Thanks a lot for reading this,
David Ch
Head of the Editing Team at SendShort
About the author
David leads the editing team at SendShort. With this help, the team delivers the latest guides on using your favorite social media apps and creating short-form content.